

This Instructable describes how to make a small weighing scale using readily available off the shelf parts.
Materials needed:
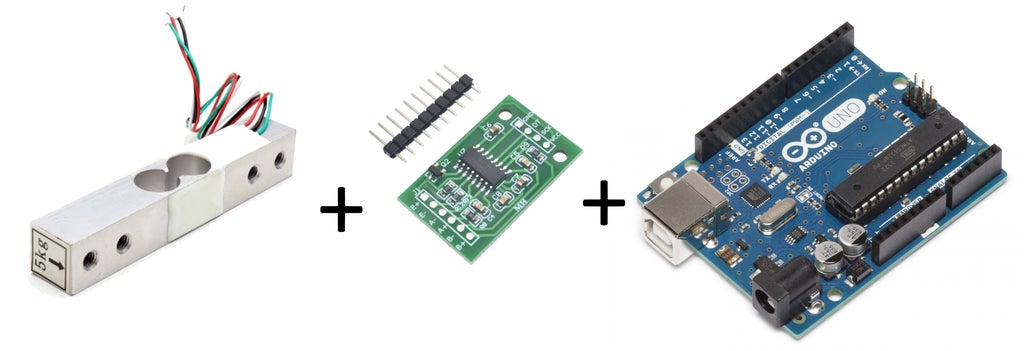
1. Arduino - this design uses a standard Arduino Uno, other Arduino versions or clones should work also
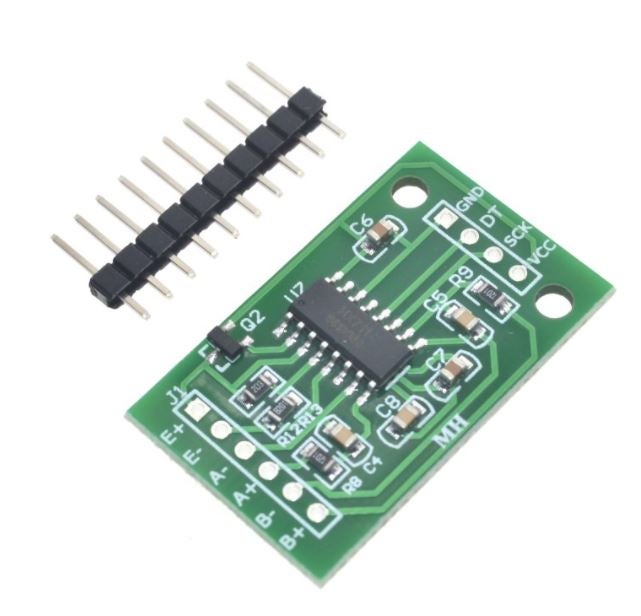
2. HX711 on breakout board - This microchip is specially made for amplifying the signals from load cells and reporting them to another mircocontroller. The load cells plug into this board, and this board tells the Arduino what the load cells measure.
3. 5kg load cell - Load cells are specially shaped metal parts that have strain gauges glue to them. The strain gauges are resistors that change their resitance when they are bent. When the metal part bends, the resistance of the load cell changes (the HX711 measures this small change in resistance accurately).
If you do purchase the kit please leave a review! It is really helpful for future buyers.
4. Sturdy flat mounting surface (x2) - a stiff piece of hardwood or metal is ideal.
5. Wires in various colors for connecting all the parts
6. Power supply for Arduino
Step 1: Mount the Load Cell
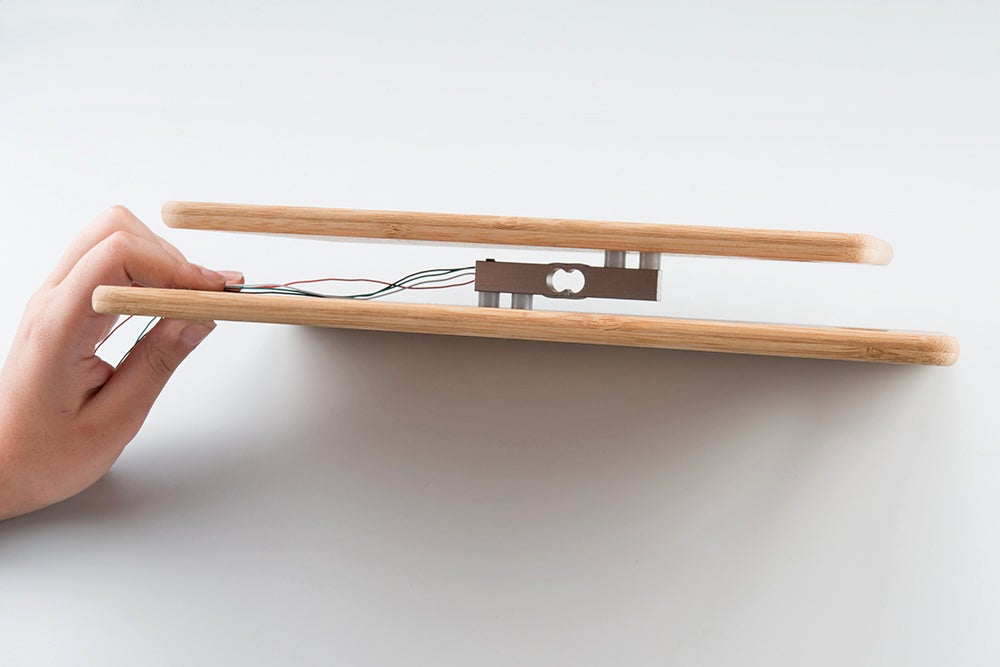
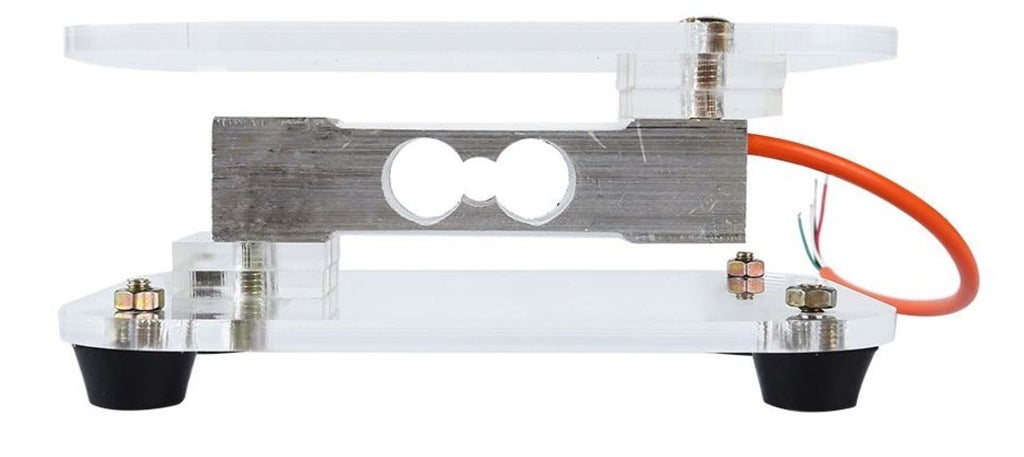
First we are going to mount the load cell. Your mount will be unique, but here are the guidelines you need to follow:
1. The aluminum load cell should have 4 tapped holes and a label showing the direction of force.Mount the side without the label to the fixed surface and mount the side with the label to the moving surface. The arrow on the labeled side should point down in the direction the platform will move when a load is applied.
2. The mounting plate and the moving plate should both be as rigid as possible
3. Make sure to put some form of rigid spacers between the mounting plates and the load cell. Standoffs or washers both work well. The goal is that any force applied to the moving plate causes the load cell to bend and twist. Without spacers, load would be transferred directly from the moving plate to the fixed plate without affecting the load cell.
Step 2: Wire the Load Cells and HX711
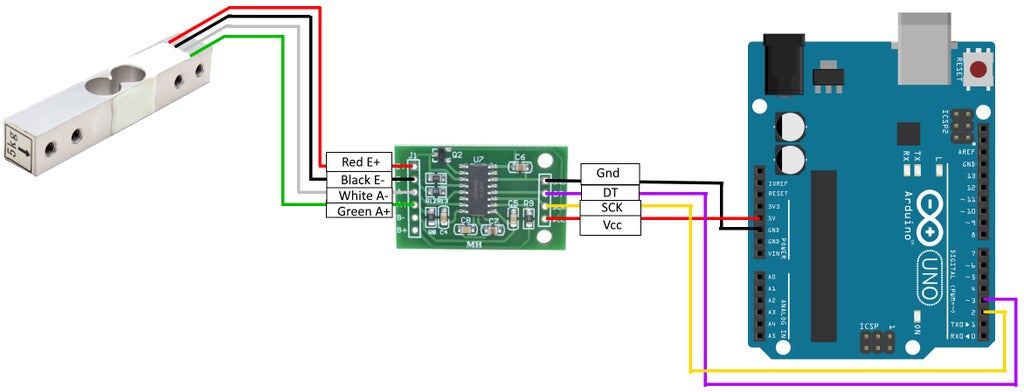
See the wiring diagram for how to connect the load cells, HX711, and Arduino.
On aluminum load cells, multiple strain gauges are already wired together to for a Wheatstone bridge. All you need to do is connect the wires to the HX711 board in the correct orientation.
Step 3: Add HX711 Library to Your Arduino IDE
The HX711 library is available here: https://github.com/bogde/HX711
See this link on the Arduino website for instructions on how to add the library to your Arduino IDE: https://www.arduino.cc/en/Guide/Libraries
Step 4: Calibrate and Weigh!
The great Arduino programs to run the scale:
https://github.com/sparkfun/HX711-Load-Cell-Amplifier
The first software step is to determine calibration factors for the scale. To do this, run this code:
/*
 Example using the SparkFun HX711 breakout board with a scale
 By: Nathan Seidle
 SparkFun Electronics
 Date: November 19th, 2014
 License: This code is public domain but you buy me a beer if you use this and we meet someday (Beerware license).

 This is the calibration sketch. Use it to determine the calibration_factor that the main example uses. It also
 outputs the zero_factor useful for projects that have a permanent mass on the scale in between power cycles.

 Setup your scale and start the sketch WITHOUT a weight on the scale
 Once readings are displayed place the weight on the scale
 Press +/- or a/z to adjust the calibration_factor until the output readings match the known weight
 Use this calibration_factor on the example sketch

 This example assumes pounds (lbs). If you prefer kilograms, change the Serial.print(" lbs"); line to kg. The
 calibration factor will be significantly different but it will be linearly related to lbs (1 lbs = 0.453592 kg).

 Your calibration factor may be very positive or very negative. It all depends on the setup of your scale system
 and the direction the sensors deflect from zero state
 This example code uses bogde's excellent library:"https://github.com/bogde/HX711"
 bogde's library is released under a GNU GENERAL PUBLIC LICENSE
 Arduino pin 2 -> HX711 CLK
 3 -> DOUT
 5V -> VCC
 GND -> GND

 Most any pin on the Arduino Uno will be compatible with DOUT/CLK.

 The HX711 board can be powered from 2.7V to 5V so the Arduino 5V power should be fine.

*/

#include "HX711.h"

#define LOADCELL_DOUT_PIN  3
#define LOADCELL_SCK_PIN  2

HX711 scale;

float calibration_factor = -7050; //-7050 worked for my 440lb max scale setup

void setup() {
  Serial.begin(9600);
  Serial.println("HX711 calibration sketch");
  Serial.println("Remove all weight from scale");
  Serial.println("After readings begin, place known weight on scale");
  Serial.println("Press + or a to increase calibration factor");
  Serial.println("Press - or z to decrease calibration factor");

  scale.begin(LOADCELL_DOUT_PIN, LOADCELL_SCK_PIN);
  scale.set_scale();
  scale.tare(); //Reset the scale to 0

  long zero_factor = scale.read_average(); //Get a baseline reading
  Serial.print("Zero factor: "); //This can be used to remove the need to tare the scale. Useful in permanent scale projects.
  Serial.println(zero_factor);
}

void loop() {

  scale.set_scale(calibration_factor); //Adjust to this calibration factor
  Serial.print("Reading: ");
  Serial.print(scale.get_units(), 1);
  Serial.print(" lbs"); //Change this to kg and re-adjust the calibration factor if you follow SI units like a sane person
  Serial.print(" calibration_factor: ");
  Serial.print(calibration_factor);
  Serial.println();

  if(Serial.available())
  {
    char temp = Serial.read();
    if(temp == '+' || temp == 'a')
      calibration_factor += 10;
    else if(temp == '-' || temp == 'z')
      calibration_factor -= 10;
  }
}
After calibrating the scale, you can run this sample program, then hack it up for your own purposes:
/*
 Example using the SparkFun HX711 breakout board with a scale
 By: Nathan Seidle
 SparkFun Electronics
 Date: November 19th, 2014
 License: This code is public domain but you buy me a beer if you use this and we meet someday (Beerware license).

 This example demonstrates basic scale output. See the calibration sketch to get the calibration_factor for your
 specific load cell setup.

 This example code uses bogde's excellent library:"https://github.com/bogde/HX711"
 bogde's library is released under a GNU GENERAL PUBLIC LICENSE

 The HX711 does one thing well: read load cells. The breakout board is compatible with any wheat-stone bridge
 based load cell which should allow a user to measure everything from a few grams to tens of tons.
 Arduino pin 2 -> HX711 CLK
 3 -> DAT
 5V -> VCC
 GND -> GND

 The HX711 board can be powered from 2.7V to 5V so the Arduino 5V power should be fine.

*/

#include "HX711.h"

#define calibration_factor -7050.0 //This value is obtained using the SparkFun_HX711_Calibration sketch

#define LOADCELL_DOUT_PIN  3
#define LOADCELL_SCK_PIN  2

HX711 scale;

void setup() {
  Serial.begin(9600);
  Serial.println("HX711 scale demo");

  scale.begin(LOADCELL_DOUT_PIN, LOADCELL_SCK_PIN);
  scale.set_scale(calibration_factor); //This value is obtained by using the SparkFun_HX711_Calibration sketch
  scale.tare(); //Assuming there is no weight on the scale at start up, reset the scale to 0

  Serial.println("Readings:");
}

void loop() {
  Serial.print("Reading: ");
  Serial.print(scale.get_units(), 1); //scale.get_units() returns a float
  Serial.print(" lbs"); //You can change this to kg but you'll need to refactor the calibration_factor
  Serial.println();
}
If you need HX711:
👉 HX711 (1pcs)
👉 HX711 (6pcs)
If you need Weight Sensor:
👉 1kg Weight Sensor
👉 5kg Weight Sensor
👉 10kg Weight Sensor
👉 20kg Weight Sensor
More Electronic Component,welcome to HALJIA!